Plumbing leak ceiling repair is the process of stopping an active water source, drying the affected structure, and restoring damaged ceiling materials to prevent mold and structural failure. Water from a burst pipe, failed toilet wax ring, or cracked supply line can saturate drywall within minutes. Mold begins growing within 24–48 hours of water intrusion, which means every hour of delay raises the stakes. Acting fast and in the right order is what separates a $300 repair from a $3,600 restoration.
How to identify and stop a plumbing leak causing ceiling damage
The first job is finding the water source. Ceiling stains and drips are symptoms. The actual leak is almost always above you, and it is rarely where the water appears on the ceiling surface. Water travels along joists and pipes before it drips, so the visible wet spot can be several feet away from the actual break.
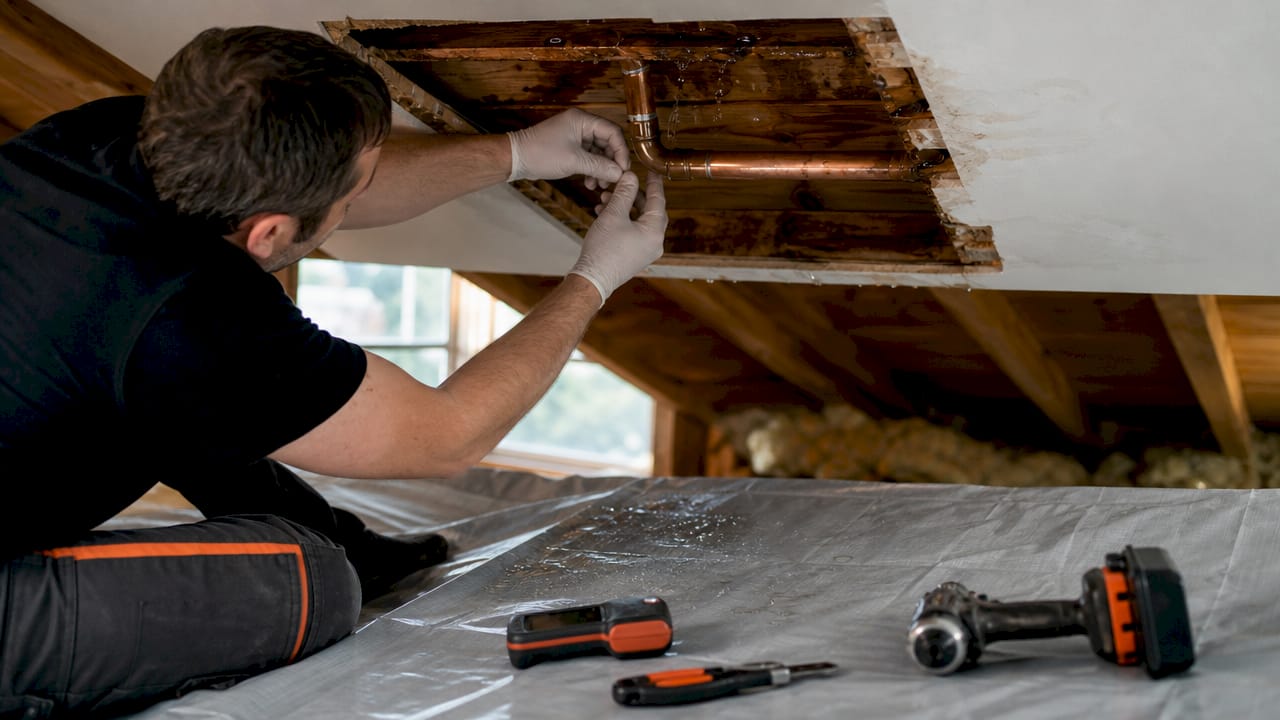
Faucet supply lines and toilet wax ring failures are the most common sources of ceiling water damage in two-story homes. Shower pan cracks and loose drain connections are close behind. Start by checking the bathroom or kitchen directly above the stain.
Follow these steps to stop the leak quickly:
- Turn off the fixture shutoff valve first. These are the small oval valves behind toilets and under sinks. Turn them clockwise until they stop.
- If you cannot find the shutoff or it fails, go to the main water valve. It is usually near the water meter, in a utility room, or in the garage. Turn it clockwise to shut off all water to the house.
- Check for a bulging ceiling. A sagging or bubbling section holds trapped water. Puncture the lowest point with a screwdriver to drain it in a controlled way. This prevents a sudden collapse that can cause far more damage.
- Place buckets and lay down plastic sheeting to protect floors and furniture from water and debris.
- Turn off the electrical breaker for any room where water is dripping near light fixtures or outlets. Water and live wiring are a serious hazard.
- Call an emergency plumber if you cannot locate or stop the leak yourself.
Pro Tip: Emergency plumber call-out fees typically run $200–$400, which is roughly 1.5 to 2 times the standard hourly rate. Ask the dispatcher upfront whether the fee is flat or applied toward the total repair bill.
How do you assess the extent of ceiling water damage?
Visible damage is only part of the picture. A ceiling that looks dry on the surface can hold significant moisture inside the drywall and framing behind it. Skipping a proper assessment is the fastest way to end up with mold inside your walls six weeks after you thought the problem was solved.
Watch for these water leak ceiling signs:
- Brown or yellow staining on the ceiling surface, often with a dark ring at the outer edge
- Bubbling or peeling paint, which signals moisture trapped between the drywall and the paint layer
- Soft or spongy drywall when you press gently with a finger
- Sagging sections that indicate the drywall has absorbed enough water to lose structural integrity
- Musty odor, which can indicate mold growth has already started inside the cavity
Surface dryness is deceptive. Professionals use moisture meters to confirm the drywall and framing read below 16% moisture content before any repair work begins. Patching over material that still reads above that threshold guarantees mold growth and repair failure.
Pro Tip: Rent or buy an inexpensive pin-type moisture meter at any hardware store. Check multiple spots around the stain, not just the center. Readings above 16% mean the area needs more drying time.
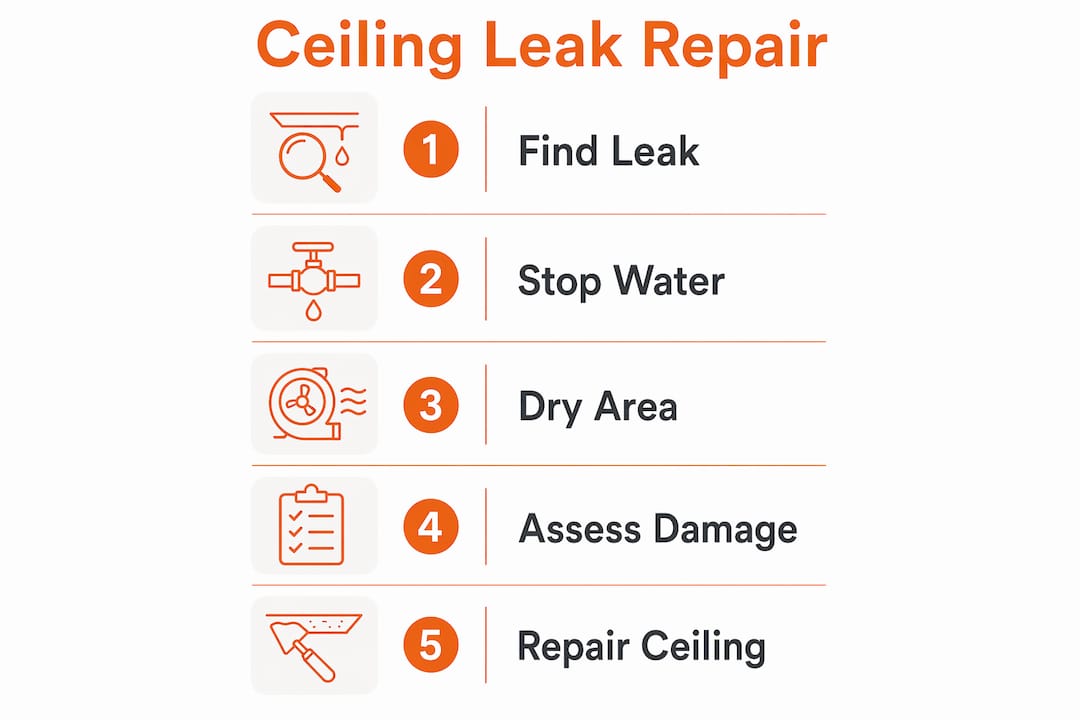
Use fans, a dehumidifier, and open windows to accelerate drying. Point at least one fan directly at the wet area and run a dehumidifier in the same room continuously. In most cases, complete drying takes 3–5 days depending on the extent of saturation and ambient humidity.
Take timestamped photos and video of all visible damage before you move anything or start cleanup. Insurance claims for accidental water damage require this documentation. Skipping it can result in a denied claim.
| Damage indicator | Action required |
|---|---|
| Surface stain, paint intact | Dry fully, prime, repaint |
| Bubbling or peeling paint | Dry, scrape, prime, repaint |
| Soft or spongy drywall | Dry fully, cut out and replace section |
| Sagging or collapsed drywall | Remove, inspect framing, replace drywall |
| Musty odor or visible mold | Professional mold assessment required |
Step-by-step guide to repairing water-damaged ceiling drywall
Once the leak is fixed and the area reads below 16% moisture, you can begin the physical repair. Rushing this step is the single most common cause of recurring ceiling stains and failed patches.
- Cut the power to the room at the breaker panel before touching the ceiling. Water may have reached wiring inside the cavity.
- Remove all wet or soft drywall. Cut back to the nearest joist on each side of the damaged section using a drywall saw. Do not leave any saturated material in place.
- Inspect the framing. Look for soft wood, black staining, or white fuzzy growth on the joists. Soft or stained wood needs treatment or replacement before you close the ceiling.
- Install backing boards between joists to give the new drywall panel a solid edge to screw into.
- Cut and hang new drywall. Use 1/2-inch drywall for standard ceilings. Drive screws every 8 inches along each joist and backing board.
- Apply joint compound in three thin coats, feathering each coat outward beyond the previous one. Let each coat dry fully before applying the next.
- Sand smooth, then apply a stain-blocking primer such as Zinsser BIN or Kilz before painting. Standard primer will not stop water stains from bleeding through.
- Match the existing texture before painting. Common ceiling textures include orange peel, knockdown, and smooth. You can find a detailed breakdown of drywall texture techniques to match your existing finish.
- Paint with a ceiling-grade flat paint to blend the repair with the surrounding surface.
For small cosmetic repairs where the drywall is still structurally sound, you can skip cutting and simply clean the stain, apply stain-blocking primer, and repaint. Average water damage repair costs run approximately $3,600 for significant damage, while minor ceiling repairs range from $200 to $1,550 depending on the size and severity.
Signs that you need a professional rather than a DIY fix:
- Mold is visible on the drywall or framing
- The damaged area is larger than a few square feet
- Structural framing shows rot or significant softening
- Moisture readings stay high after several days of drying
- The ceiling is near electrical wiring or a panel
What are the most common mistakes in ceiling leak repair?
Applying cosmetic patches or paint before fixing the moisture source is the most common cause of repair failure. The stain returns within weeks, the new drywall softens, and the repair costs more the second time around.
Avoid these pitfalls:
- Skipping the leak fix. No repair holds if water is still entering the structure. Confirm the plumbing is fully repaired before touching the ceiling.
- Painting over active stains without stain-blocking primer. Standard latex primer does not seal water stains. Stains that bleed through paint after repair signal ongoing moisture intrusion and require professional leak detection with thermal imaging.
- Removing drywall before documenting damage. Premature drywall removal destroys insurance evidence and can expose hidden electrical hazards without a professional assessment.
- Ignoring a musty smell. A persistent odor after drying means mold is present inside the cavity. Painting over it does not eliminate it.
- Failing to monitor after repair. Check the repaired area monthly for the first three months. Press the drywall gently and look for new staining or soft spots.
Pro Tip: Set a phone reminder to inspect the repaired ceiling 30 days after completion. Catching a slow recurrence early costs far less than discovering it after the mold has spread.
When should you call a professional for ceiling leak repairs?
Some ceiling leak situations are straightforward DIY projects. Others require licensed professionals, and getting that wrong costs far more than the professional fee.
Call a professional when:
- Mold covers more than 10 square feet or is inside the wall cavity
- The ceiling shows structural sagging over a large area
- Moisture readings stay elevated after 5 days of active drying
- The leak source is inside a wall or inaccessible without demolition
- You are filing an insurance claim and need documented professional assessment
The typical service chain for a significant ceiling leak runs from a licensed plumber to stop the source, to a water damage restoration contractor to dry and assess, to a drywall specialist for ceiling repair, and finally to a mold remediator if testing confirms contamination. Myhandymanbuddy handles plumbing repairs and ceiling restoration work, which reduces the number of separate contractors you need to coordinate.
| Service type | When you need it |
|---|---|
| Licensed plumber | Active leak, inaccessible pipe, supply line failure |
| Water damage restoration | Large saturation area, structural concern, insurance claim |
| Drywall specialist | Replacement of large ceiling sections, texture matching |
| Mold remediator | Visible mold, persistent odor, positive mold test |
Key Takeaways
Effective plumbing leak ceiling repair requires stopping the water source first, confirming full dryness with a moisture meter, and completing structural repairs before any cosmetic finishing.
| Point | Details |
|---|---|
| Stop the leak first | No ceiling repair holds while water is still entering the structure. |
| Confirm dryness before patching | Use a moisture meter and wait for readings below 16% before closing the ceiling. |
| Document before cleanup | Timestamped photos and video protect your insurance claim from denial. |
| Use stain-blocking primer | Standard primer will not stop water stains from bleeding through new paint. |
| Call professionals for mold | Visible mold or persistent odor requires professional assessment, not paint. |
What I’ve learned from watching homeowners handle ceiling leaks
The mistake I see most often is not the repair itself. It is the sequence. Homeowners get the water stopped, look up at the stain, and immediately want it gone. That urgency is understandable. A brown ring on a white ceiling is an eyesore and a daily reminder of a stressful event. But painting over a ceiling that has not fully dried is the equivalent of putting a bandage over an infected wound. You feel better for about two weeks, and then the problem is worse than before.
The second pattern I see is homeowners who skip documentation because they want to clean up fast. I get it. Nobody wants to stand in a wet room taking photos. But a denied insurance claim because you cleaned up before documenting is a painful and entirely avoidable outcome. Spend 10 minutes with your phone before you touch anything.
The cases that genuinely require professional help are the ones involving mold inside the cavity or moisture that will not drop below 16% after several days of drying. Those are not DIY situations, and pushing through them without the right equipment causes health problems and structural damage that compound over time. Knowing when to hand it off is not a failure. It is the right call.
— Ryan
Myhandymanbuddy can handle your ceiling leak from source to finish
Water damage does not wait for a convenient time, and neither should your repair plan. Myhandymanbuddy provides professional plumbing leak detection and ceiling restoration services for homeowners who need the job done right the first time.

From stopping the active leak to replacing damaged drywall and matching your existing ceiling finish, the Myhandymanbuddy team covers the full repair process under one roof. Their handyman repair services include 24/7 support, so you are never left waiting when water damage strikes. Contact Myhandymanbuddy to schedule a damage assessment and get a clear repair plan before the problem gets worse.
FAQ
How long does ceiling water damage take to dry?
Most water-damaged ceilings take 3–5 days to dry fully with fans and a dehumidifier running continuously. A moisture meter reading below 16% confirms the area is ready for repair.
Can I paint over a water-stained ceiling without replacing the drywall?
Yes, if the drywall is structurally sound and fully dry. Apply a stain-blocking primer such as Kilz or Zinsser BIN first. Standard paint or primer will not prevent the stain from bleeding through.
What causes a ceiling to bulge after a plumbing leak?
A bulging ceiling holds trapped water above the drywall surface. Puncturing the lowest point of the bulge with a screwdriver drains the water in a controlled way and prevents a sudden collapse.
How much does ceiling water damage repair cost?
Minor ceiling repairs range from $200 to $1,550. Significant water damage repairs average around $3,600, depending on the size of the affected area, mold presence, and whether structural framing needs replacement.
When does a ceiling leak require a mold inspection?
A mold inspection is necessary when you smell a persistent musty odor after drying, see dark or fuzzy growth on drywall or framing, or when moisture readings stay elevated after 5 days of active drying.
